Croissant Bread: The Perfect Recipe for Flaky Layers

Croissant bread is a popular choice for those who appreciate buttery, flaky pastries. This recipe guides you through creating delicious croissant bread from scratch. Whether you’re a home baker or just love fresh bread, follow these steps to achieve bakery-quality results.
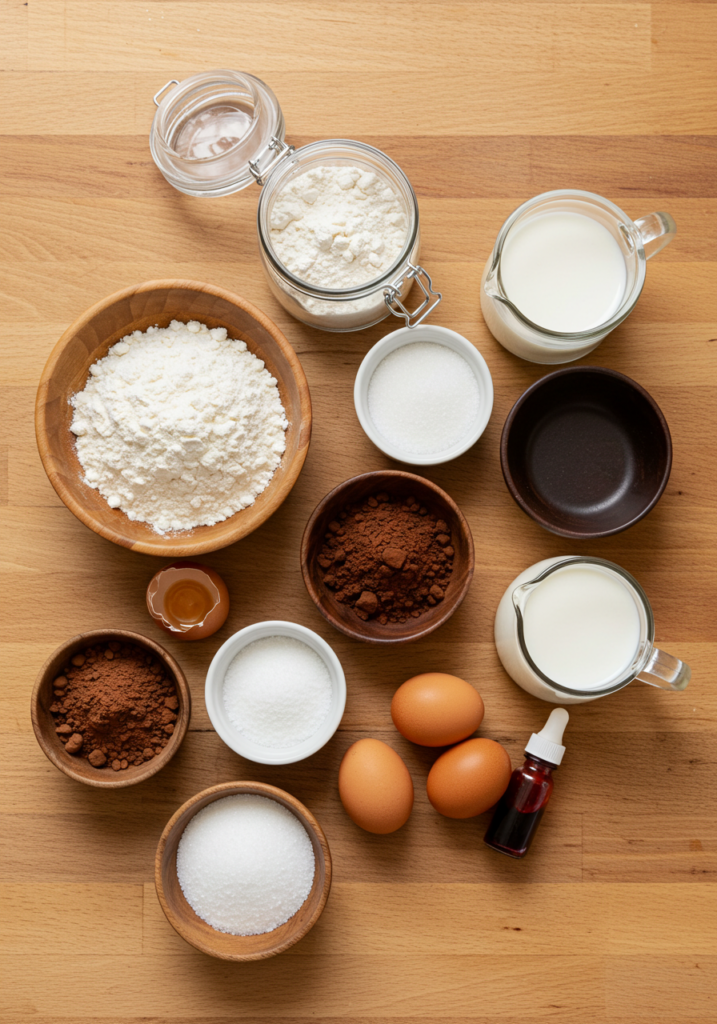
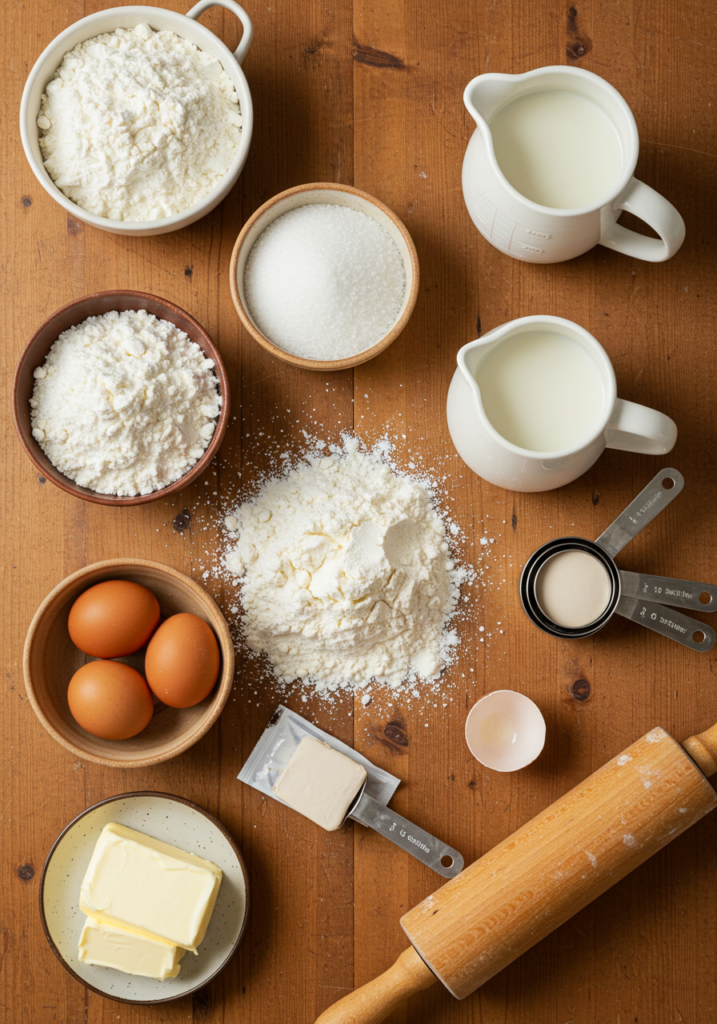
Ingredients

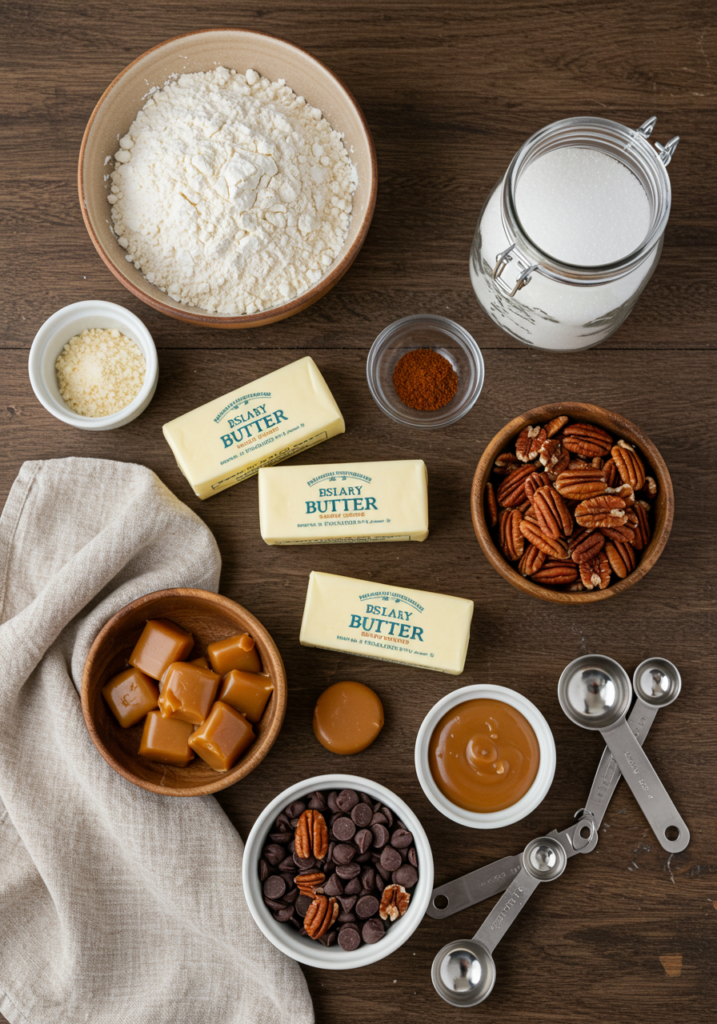
  • 3 1/2 cups (440g) all-purpose flour
  • 1/4 cup (50g) sugar
  • 1 1/2 teaspoons salt
  • 2 teaspoons active dry yeast
  • 1/2 cup (120ml) warm milk
  • 1/2 cup (120ml) warm water
  • 1 cup (225g) unsalted butter, chilled
  • 1 large egg (for egg wash)
Croissant Bread:

Steps to Make Croissant Bread

Prepare the Dough

  1. In a bowl, mix warm milk and warm water. Sprinkle yeast over the liquid and let it sit for 5 minutes.
  2. Add sugar, salt, and flour to the mixture. Combine to form a dough.
  3. Knead the dough for 8–10 minutes until smooth.
  4. Cover the dough with a damp cloth and let it rise for 1 hour in a warm place.

Prepare the Butter Block

  1. Place the chilled butter between two sheets of parchment paper.
  2. Roll it into a rectangle about 6×8 inches.
  3. Refrigerate for 30 minutes to firm up.

Laminate the Dough

  1. Roll the dough into a rectangle twice the size of the butter block.
  2. Place the butter block in the center and fold the dough over it like an envelope.
  3. Roll out the dough into a long rectangle. Fold it into thirds (letter fold).
  4. Refrigerate for 30 minutes. Repeat this rolling and folding process 3 times.

Shape and Proof

  1. Roll the laminated dough into a large rectangle.
  2. Cut into triangles and roll them tightly from the base to the tip to form croissant shapes.
  3. Place on a baking tray lined with parchment paper. Cover and let them proof for 1 hour.
Croissant Bread:

Bake

  1. Preheat your oven to 375°F (190°C).
  2. Brush the croissants with beaten egg.
  3. Bake for 15–20 minutes until golden brown.
Croissant Bread:

Tips for Perfect Croissant Bread

  • Use high-quality butter for rich flavor.
  • Keep the dough and butter cold to achieve distinct layers.
  • Avoid overproofing to maintain structure.
Croissant Bread:

FAQs About Croissant Bread

1. Can I freeze croissant dough? Yes. Freeze after shaping. Thaw overnight in the fridge, proof, and bake as usual.

2. How long do croissants stay fresh? Store at room temperature for up to 2 days. Reheat in the oven for a fresh taste.

3. Why is my dough not rising? Ensure the yeast is fresh and the liquid is warm, not hot.

4. Can I make this recipe vegan? Use plant-based milk and butter. Skip the egg wash or use a mix of plant-based milk and syrup.

With this croissant bread recipe, you’ll master the art of homemade flaky layers. Visit our baking tips section for more insights and tricks!

The Perfect Tiramisu Recipe: An Italian Classic You Can Master

Tiramisu is a beloved Italian dessert that blends rich coffee, creamy mascarpone, and delicate ladyfingers. This guide will help you make an authentic Tiramisu that impresses every time.

Ingredients of Tiramisu

  • Ladyfingers (Savoiardi): 200g
  • Mascarpone cheese: 500g
  • Eggs: 4 large (separated)
  • Granulated sugar: 100g
  • Espresso coffee: 300ml (cooled)
  • Cocoa powder: 2 tablespoons (for dusting)
  • Dark chocolate shavings: Optional (for garnish)
  • Marsala wine or coffee liqueur: 2 tablespoons (optional)

Step-by-Step Tiramisu instructions

1. Prepare the Coffee Base

  • Brew 300ml of strong espresso and let it cool.
  • Add Marsala wine or coffee liqueur for an extra depth of flavor (optional).

2. Whisk the Egg Yolks and Sugar

  • In a bowl, beat the egg yolks and sugar until the mixture is pale and creamy.
  • Gently fold in the mascarpone until smooth.

3. Whip the Egg Whites

  • In another bowl, whisk the egg whites to stiff peaks.
  • Carefully fold the whipped egg whites into the mascarpone mixture to create a light and airy texture.

4. Layer the Tiramisu

  • Quickly dip each ladyfinger into the cooled espresso. Avoid soaking to prevent sogginess.
  • Arrange a layer of dipped ladyfingers at the bottom of a rectangular dish.
  • Spread half of the mascarpone mixture evenly over the ladyfingers.
  • Add another layer of dipped ladyfingers on top.
  • Spread the remaining mascarpone mixture over the second layer.

5. Chill and Garnish

  • Cover the dish with plastic wrap and refrigerate for at least 4 hours (preferably overnight).
  • Before serving, dust the top with cocoa powder.
  • Add chocolate shavings for an extra touch (optional).

Tips for Success

  • Use fresh eggs for the best taste and texture.
  • Let the Tiramisu chill overnight to allow the flavors to meld.
  • Always use high-quality mascarpone and espresso.

Nutritional Information (Per Serving)

  • Calories: 350
  • Protein: 7g
  • Fat: 22g
  • Carbohydrates: 28g

Frequently Asked Questions

1. Can I make Tiramisu without alcohol? Yes, simply omit the Marsala wine or coffee liqueur.

2. Can I use cream instead of mascarpone? Mascarpone is essential for authenticity, but heavy cream can be a substitute in a pinch.

3. How long does Tiramisu last in the fridge? Tiramisu can be stored for up to 3 days in the refrigerator.

4. Can I make a non-coffee version? Replace espresso with hot chocolate or milk for a kid-friendly variation.

5. Is Tiramisu safe for pregnant women? Use pasteurized eggs or egg-free alternatives to make it safe.

Mastering Tiramisu is easier than it looks. With this recipe, you can create a restaurant-quality dessert in your own kitchen. Share it with friends and family for a true taste of Italy.

Spice Up Your Table with Bang Bang Chicken: Recipe, Tips, and FAQs

If you’re on the hunt for a dish that brings bold flavors and a hint of spice, Bang Bang Chicken is your perfect match. This crowd-pleasing recipe, inspired by Asian cuisine, features crispy chicken tossed in a creamy, tangy, and slightly spicy sauce. Whether you’re serving it as an appetizer, a main course, or a party snack, Bang Bang Chicken is sure to impress.

What is Bang Bang Chicken?

Bang Bang Chicken is a dish with roots in Chinese street food, originally served cold with shredded chicken and a sesame-based sauce. However, the modern version popular in the West typically consists of crispy fried chicken bites drizzled with a creamy, sweet, and spicy sauce made from mayonnaise, sweet chili sauce, and sriracha.

Why You’ll Love This Recipe

  • Easy to Make: With simple steps and readily available ingredients, you can whip this up in no time.
  • Customizable: Adjust the spice level to suit your taste.
  • Versatile: Serve it as a snack, appetizer, or main dish with rice or noodles.
Bang Bang Chicken

Ingredients for Bang Bang Chicken

the Chicken:

  • 500g chicken breast or thighs, cut into bite-sized pieces
  • 1 cup all-purpose flour
  • 1 cup cornstarch
  • 2 large eggs, beaten
  • 1 tsp garlic powder
  • 1 tsp paprika
  • Salt and pepper to taste
  • Oil for frying

the Bang Bang Sauce:

  • 1/2 cup mayonnaise
  • 1/4 cup sweet chili sauce
  • 2 tbsp sriracha (adjust to taste)
  • 1 tbsp honey or sugar
  • 1 tsp rice vinegar (optional, for extra tang)
Bang Bang Chicken

How to Make Chicken

1: Prepare the Chicken

  1. Season the chicken pieces with salt, pepper, garlic powder, and paprika.
  2. Set up a breading station with three bowls: one for flour, one for beaten eggs, and one for cornstarch.
  3. Dredge each chicken piece in flour, dip in the egg, and coat with cornstarch. Ensure each piece is evenly coated.

2: Fry the Chicken

  1. Heat oil in a deep pan or fryer to 175°C (350°F).
  2. Fry the chicken in batches for 3-4 minutes until golden and crispy. Drain on a wire rack or paper towels.

3: Make the Sauce

  1. In a bowl, whisk together mayonnaise, sweet chili sauce, sriracha, honey, and rice vinegar.
  2. Taste and adjust the spice or sweetness as needed.
sauce

4: Toss and Serve

  1. Gently toss the fried chicken pieces in the Bang Bang sauce until evenly coated.
  2. Serve immediately, garnished with chopped green onions or sesame seeds for extra flair.

Tips for Perfect Recipe

  • Double Fry for Extra Crispiness: Fry the chicken once, let it cool, and fry again for ultimate crunch.
  • Use an Air Fryer: For a healthier version, cook the breaded chicken in an air fryer at 200°C (400°F) for 12-15 minutes, flipping halfway.
  • Make It Dairy-Free: Substitute mayonnaise with a vegan or dairy-free alternative.
Bang Bang Chicken

Frequently Asked Questions

What Can I Serve with Bang Bang Chicken?

Bang Bang Chicken pairs well with steamed rice, fried rice, noodles, or a fresh green salad. You can also use it as a filling for wraps or tacos.

Can I Make It Ahead of Time?

Yes, you can prepare the chicken and sauce separately. Store them in airtight containers in the refrigerator for up to 2 days. Reheat the chicken in the oven or air fryer for crispiness before tossing with the sauce.

Is Bang Bang Chicken Spicy?

The level of spice depends on the amount of sriracha used. Reduce or omit the sriracha for a milder version.

Can I Use Other Proteins?

Absolutely! Shrimp, tofu, or even cauliflower can be used as substitutes for chicken.

How Do I Store Leftovers?

Store leftovers in an airtight container in the fridge for up to 3 days. Reheat in the oven or air fryer to maintain crispiness.

Bang Bang Chicken is a flavorful and versatile dish that’s perfect for any occasion. With this easy recipe and helpful tips, you’ll have a show-stopping dish that’s bound to become a favorite. Give it a try, and don’t forget to share your experience!

Beef Tenderloin with Yogurt Sauce Recipe

When it comes to a dish that strikes the perfect balance between sophistication and simplicity, beef tenderloin with yogurt sauce is a true winner. Whether you’re preparing a meal for a family gathering or an intimate dinner, this recipe delivers a flavorful experience that’s both satisfying and easy to make. In this article, we’ll guide you through the recipe, share some cooking tips, and answer common questions to help you perfect this dish.

Ingredients of Beef Tenderloin with Yogurt Sauce

the Beef Tenderloin:

  • 1 kg beef tenderloin (trimmed)
  • 2 tbsp olive oil
  • 2 tsp salt
  • 1 tsp freshly ground black pepper
  • 1 tsp garlic powder
  • 1 tsp smoked paprika (optional)

the Yogurt Sauce:

  • 1 cup plain Greek yogurt
  • 2 tbsp fresh lemon juice
  • 1 garlic clove (minced)
  • 1 tbsp fresh dill (chopped)
  • 1 tbsp fresh parsley (chopped)
  • Salt and pepper to taste
Beef Tenderloin with Yogurt Sauce

Instructions

Preparing the Beef Tenderloin:

  1. Preheat the oven to 200°C (400°F).
  2. Season the beef: Rub the tenderloin with olive oil, salt, black pepper, garlic powder, and smoked paprika for added depth of flavor.
  3. Sear the meat: Heat a skillet over medium-high heat. Sear the tenderloin on all sides for 2-3 minutes until a golden crust forms.
  4. Roast the beef: Transfer the seared tenderloin to a baking dish and roast in the oven for 25-30 minutes or until the internal temperature reaches your desired doneness (57°C/135°F for medium-rare).
  5. Rest the meat: Remove the beef from the oven and let it rest for 10 minutes before slicing.
Beef Tenderloin

Preparing the Yogurt Sauce:

  1. Mix the ingredients: In a bowl, combine Greek yogurt, lemon juice, minced garlic, dill, parsley, salt, and pepper.
  2. Adjust to taste: Mix well and adjust seasoning as needed. Chill the sauce until ready to serve.

Serving YourBeef Tenderloin with Yogurt Sauce Suggestions

Slice the beef tenderloin into medallions and arrange them on a serving platter. Drizzle with the yogurt sauce and garnish with additional dill or parsley for a fresh touch. Pair this dish with roasted vegetables, mashed potatoes, or a light green salad for a complete meal.

Tips for Success

  • Choosing quality beef: Opt for fresh, high-quality tenderloin for the best flavor and tenderness.
  • Use a meat thermometer: This ensures precision and helps you avoid overcooking.
  • Make the sauce ahead: Preparing the yogurt sauce in advance allows the flavors to meld beautifully.

Nutritional Information (Per Serving)

  • Calories: 320
  • Protein: 35g
  • Fat: 18g
  • Carbohydrates: 5g
  • Fiber: 1g
Beef Tenderloin with Yogurt Sauce

FAQs

Can I use a different cut of beef for this recipe? A: Yes, you can use other cuts like sirloin or ribeye, but the cooking time may vary.

How long can I store the yogurt sauce? A: The sauce can be stored in an airtight container in the fridge for up to 3 days.

What wine pairs well with beef tenderloin? A: A full-bodied red wine like Cabernet Sauvignon or Merlot complements the richness of the beef.

Can I make this dish dairy-free? A: Substitute the Greek yogurt with a dairy-free alternative like coconut or almond yogurt.

Beef tenderloin with yogurt sauce is a versatile and elegant dish that can be tailored to suit various tastes and occasions. Give this recipe a try and impress your guests with its delicious simplicity!

Irresistible Pecan Turtle Bars Recipe: Perfect for Every Occasion

If you’re craving a dessert that’s both indulgent and easy to make, pecan turtle bars are your answer. Combining the rich flavors of caramel, chocolate, and pecans over a buttery shortbread crust, these bars are perfect for any occasion, whether it’s a casual snack or a festive gathering. Let’s dive into this irresistible recipe while keeping things optimized for your sweet tooth and SEO!

Ingredients of Pecan Turtle Bars

For the Shortbread Crust:

  • 1 cup (230g) unsalted butter, softened
  • 2 cups (250g) all-purpose flour
  • ½ cup (100g) granulated sugar
  • ¼ tsp salt

the Caramel Layer:

  • 1 cup (200g) granulated sugar
  • ½ cup (120ml) heavy cream
  • 6 tbsp (85g) unsalted butter
  • ¼ tsp salt

the Topping:

  • 1 cup (175g) semi-sweet chocolate chips
  • 1 cup (120g) chopped pecans
Pecan Turtle Bars

Instructions: How to Make Pecan Turtle Bars

1: Prepare the Crust

  1. Preheat your oven to 350°F (175°C). Grease a 9×13-inch (23×33 cm) baking pan and line it with parchment paper, leaving some overhang for easy removal.
  2. In a mixing bowl, combine softened butter, sugar, flour, and salt. Mix until the dough is crumbly.
  3. Press the dough evenly into the prepared pan. Bake for 20-25 minutes or until golden. Set aside to cool.

2: Make the Caramel

  1. In a medium saucepan, combine sugar, butter, and heavy cream over medium heat.
  2. Stir continuously until the mixture comes to a boil. Reduce heat to medium-low and cook for about 5-7 minutes, stirring occasionally, until the caramel thickens slightly.
  3. Pour the caramel over the cooled crust, spreading it evenly.

3: Add the Topping

  1. Sprinkle chopped pecans evenly over the caramel layer.
  2. Melt the chocolate chips in a microwave-safe bowl, heating in 20-second intervals and stirring until smooth.
  3. Drizzle the melted chocolate over the pecans. Use a fork or spatula to create a marbled effect if desired.
Pecan Turtle Bars

4: Chill and Serve

  1. Refrigerate the bars for at least 2 hours or until firm.
  2. Remove from the pan using the parchment overhang and cut into squares or bars.
  3. Serve and enjoy your pecan turtle bars!
Pecan Turtle Bars

Why You’ll Love These Bars

  • Time-Saving: Perfect for those who want a gourmet dessert without spending hours in the kitchen.
  • Customizable: Swap semi-sweet chocolate for dark or milk chocolate to suit your taste.
  • Make-Ahead Friendly: Store them in an airtight container in the fridge for up to a week.
Pecan Turtle Bars

Frequently Asked Questions (FAQs)

Q: Can I use store-bought caramel instead of making my own? A: Absolutely! While homemade caramel adds a fresh touch, store-bought caramel sauce is a great time-saving alternative.

Q: How do I prevent the chocolate from cracking when cutting the bars? A: Use a warm knife to slice through the bars. Simply dip the knife in hot water, wipe it dry, and cut.

Q: Are there other nuts I can use? A: Yes! Walnuts or almonds work well if pecans aren’t your favorite or aren’t available.

Q: Can I make these bars gluten-free? A: Swap the all-purpose flour in the crust with a gluten-free baking blend for a gluten-free treat.

Q: What’s the best way to store these bars? A: Keep them in an airtight container in the fridge. For longer storage, freeze them for up to 2 months.

Whether you’re new to baking or a seasoned pro, these pecan turtle bars will surely impress your family and friends. Try the recipe and let us know how it turns out in the comments below!

Chocolate Brownie Cookies Recipe: The Ultimate Indulgence

If you’ve ever been torn between the rich, fudgy goodness of brownies and the chewy perfection of cookies, this recipe is for you. Chocolate Brownie Cookies combine the best of both worlds into one irresistible treat. These cookies are rich, gooey, and chocolatey, with the signature crackly tops of brownies—perfect for chocolate lovers!

In this article, we’ll guide you through the recipe step by step, include some tips for baking success, and answer frequently asked questions to ensure your cookies turn out perfectly every time.

Chocolate Brownie Cookies

Ingredients for Chocolate Brownie Cookies

Gather these ingredients for about 18-20 cookies:

Dry Ingredients:
  • 1/2 cup (60g) all-purpose flour
  • 1/4 tsp baking powder
  • 1/4 tsp salt
Wet Ingredients:
  • 2 cups (340g) semi-sweet chocolate chips
  • 1/4 cup (56g) unsalted butter
  • 3/4 cup (150g) granulated sugar
  • 1/4 cup (50g) brown sugar
  • 2 large eggs
  • 1 tsp vanilla extract
Optional Add-ins:
  • 1/2 cup chopped nuts (walnuts or pecans)
  • 1/2 cup white chocolate chips or dark chocolate chunks
Chocolate Brownie Cookies

Step-by-Step Instructions

1. Preheat the Oven
  • Preheat your oven to 350°F (175°C) and line two baking sheets with parchment paper.
2. Melt the Chocolate and Butter
  • In a microwave-safe bowl, melt the semi-sweet chocolate chips and unsalted butter together in 20-second intervals, stirring between each interval until smooth. Let it cool slightly.
3. Mix the Dry Ingredients
  • In a separate bowl, whisk together the flour, baking powder, and salt.
4. Combine Wet Ingredients
  • In a large mixing bowl, beat the eggs, granulated sugar, and brown sugar together until light and creamy (about 2 minutes). Add the vanilla extract and the slightly cooled chocolate mixture, then mix until combined.
Chocolate Brownie Cookies
5. Incorporate Dry Ingredients
  • Slowly fold the dry ingredients into the wet mixture until just combined. Avoid overmixing to keep the batter tender.
6. Add Chocolate Chunks or Nuts (Optional)
  • If desired, gently fold in chopped nuts or extra chocolate chunks for added texture and flavor.
7. Scoop and Bake
  • Using a cookie scoop or tablespoon, drop spoonfuls of batter onto the prepared baking sheets, leaving about 2 inches between each cookie.
  • Bake for 10-12 minutes, or until the tops are crackly and the edges are set but the centers look slightly soft. This gives the cookies their signature brownie-like texture.
Chocolate Brownie Cookies
8. Cool and Serve
  • Allow the cookies to cool on the baking sheet for 5 minutes before transferring them to a wire rack to cool completely. Enjoy them warm or at room temperature!

Tips for the Perfect Chocolate Brownie Cookies

  1. Don’t overbake: The cookies will continue to cook on the baking sheet after removing them from the oven. Take them out when the centers are slightly soft for the best texture.
  2. Use high-quality chocolate: Since chocolate is the star of the recipe, opt for good-quality chocolate chips or baking chocolate.
  3. Chill the dough (optional): If the dough feels too runny, refrigerate it for 10-15 minutes before scooping.
  4. Double the batch: These cookies disappear fast, so you might want to make extra!
Chocolate Brownie Cookies

FAQs About Chocolate Brownie Cookies

1. Can I freeze the dough?

Yes! Scoop the cookie dough onto a baking sheet and freeze until solid, then transfer to a freezer bag. Bake from frozen, adding 1-2 minutes to the baking time.

2. How should I store these cookies?

Store them in an airtight container at room temperature for up to 5 days. For longer storage, freeze them in a sealed container for up to 3 months.

3. Can I use dark chocolate instead of semi-sweet?

Absolutely! Dark chocolate will make the cookies even richer. Adjust the sweetness to your taste by reducing the sugar slightly.

4. Why didn’t my cookies get crackly tops?

This usually happens if the melted chocolate mixture is too hot when combined with the eggs. Let it cool slightly to avoid this.

5. Can I make these gluten-free?

Yes! Substitute the all-purpose flour with a gluten-free baking blend. The texture might differ slightly but will still be delicious.


These Chocolate Brownie Cookies are perfect for any occasion, whether you’re hosting a party or indulging in a midnight treat. With their fudgy centers and crisp edges, they’ll quickly become a household favorite. Bake a batch today and enjoy the magic of brownies and cookies in one bite!

Marry Me Chicken Pasta Recipe: A Dish to Fall in Love With

Looking for a dish that’s irresistibly creamy, rich in flavor, and sure to impress? The Marry Me Chicken Pasta Recipe is here to steal your heart (and your taste buds). This recipe is aptly named because it’s so good, it might just inspire a proposal—or at least make your dinner guests swoon!

In this article, we’ll dive into what makes this dish special, share the recipe and step-by-step instructions, and top it off with helpful FAQs to ensure your cooking experience is as smooth as your creamy sauce.

Why Is It Called “Marry Me Chicken Pasta”?

The name isn’t just about the taste; it’s about the emotions it evokes. Creamy, flavorful, and comforting, this dish has everything to create a memorable dining experience. Whether you’re cooking for date night, family, or friends, it’s bound to leave an impression.

Marry Me Chicken Pasta

Ingredients for Marry Me Chicken Pasta

Before you start, gather these simple yet flavorful ingredients:

the Chicken:
  • 2 large chicken breasts
  • 2 tbsp olive oil
  • Salt and black pepper (to taste)
  • 1 tsp Italian seasoning
  • 1/2 tsp garlic powder
the Sauce:
  • 3 cloves garlic (minced)
  • 1 cup heavy cream
  • 1/2 cup chicken broth
  • 1/3 cup grated Parmesan cheese
  • 1/2 cup sun-dried tomatoes (chopped)
  • 1 tsp red pepper flakes (adjust to taste)
  • Fresh basil (for garnish)
the Pasta:
  • 300g fettuccine or your favorite pasta
  • Salt (for boiling water)

Step-by-Step Instructions

1. Prepare the Chicken
  1. Season chicken breasts with salt, pepper, Italian seasoning, and garlic powder.
  2. Heat olive oil in a large skillet over medium heat. Add the chicken and sear for 5-7 minutes per side until golden brown and fully cooked.
  3. Remove the chicken from the skillet and set aside.
2. Cook the Pasta
  1. Bring a large pot of salted water to a boil.
  2. Cook the pasta according to the package instructions. Reserve 1/2 cup of pasta water, then drain.
3. Make the Sauce
  1. In the same skillet used for the chicken, add a bit more olive oil if needed. Sauté the garlic until fragrant (about 30 seconds).
  2. Add heavy cream, chicken broth, Parmesan cheese, and red pepper flakes. Stir well and simmer for 5 minutes.
  3. Stir in sun-dried tomatoes and let the sauce thicken slightly.
4. Combine It All
  1. Slice the cooked chicken into strips and return it to the skillet with the sauce.
  2. Toss the cooked pasta into the skillet, ensuring it’s coated with the sauce. Use the reserved pasta water to adjust the consistency if needed.
5. Garnish and Serve
  1. Garnish with fresh basil and extra Parmesan cheese.
  2. Serve immediately and watch everyone fall in love with this creamy, flavorful dish.

Tips to Elevate Your Marry Me Chicken Pasta

  • Add Veggies: Sautéed spinach or mushrooms can add an extra layer of flavor.
  • Use Fresh Pasta: If available, fresh pasta can make the dish feel even more luxurious.
  • Make It Spicy: Add more red pepper flakes or even a dash of cayenne for a kick.
  • Serve with Bread: A slice of crusty bread is perfect for soaking up the creamy sauce.
Marry Me Chicken Pasta

FAQs About Marry Me Chicken Pasta

1. Can I Use a Different Protein?

Absolutely! Shrimp, salmon, or even tofu work wonderfully in this recipe.

2. Can I Make It Ahead of Time?

You can prepare the sauce in advance and reheat it when ready to serve. Cook the pasta fresh for the best texture.

3. Is There a Dairy-Free Alternative?

Yes, you can substitute heavy cream with coconut cream and use a dairy-free Parmesan alternative.

4. How Do I Store Leftovers?

Store leftovers in an airtight container in the refrigerator for up to 3 days. Reheat gently on the stovetop or microwave.

5. What Can I Serve with This Dish?

Pair it with a fresh green salad, garlic bread, or roasted vegetables for a complete meal.

This Marry Me Chicken Pasta Recipe is a true crowd-pleaser, perfect for any occasion. Whether you’re trying to impress a special someone or simply treating yourself, this dish promises a dining experience to remember. So why not give it a try? Who knows—you might just fall in love with it!

Bake the Perfect Red Velvet Cake: Easy Recipe.

Red Velvet cake is a ca1 cup (240ml) buttermilk, room temperature

  • 2 large eggs, room temperature
  • 2 tablespoons (30ml) red food coloring
  • 1 teaspoon vanilla extract
  • 1 teaspoon white vinegar

For the frosting:

  • 8 oz (226g) cream cheese, softened
  • 1/2 cup (115g) unsalted butter, softened
  • 4 cups (480g) powdered sugar, sifted
  • 1 teaspoon vanilla extract
Red Velvet Cake ingredient

Steps:

  1. Preheat and Prepare: Preheat your oven to 350°F (175°C). Grease and flour two 9-inch (23 cm) round cake pans or line them with parchment paper.
  2. Mix Dry Ingredients: In a large bowl, sift together the flour, sugar, baking soda, salt, and cocoa powder.
  3. Combine Wet Ingredients: In another bowl, whisk together the vegetable oil, buttermilk, eggs, red food coloring, vanilla extract, and vinegar until smooth.
  4. Blend: Gradually add the wet ingredients to the dry ingredients, mixing until just combined. Do not overmix.
  5. Bake: Divide the batter evenly between the prepared cake pans. Bake for 25-30 minutes, or until a toothpick inserted into the center comes out clean.
  6. Cool: Let the cakes cool in the pans for 10 minutes, then transfer to a wire rack to cool completely.
  7. Prepare Frosting: In a large bowl, beat the cream cheese and butter together until smooth. Gradually add the powdered sugar, one cup at a time, beating well after each addition. Stir in the vanilla extract.
  8. Assemble: Place one cake layer on a serving plate. Spread a generous layer of frosting on top. Add the second cake layer and frost the top and sides. Decorate as desired.
  9. Serve: Slice and enjoy your homemade Red Velvet cake!
Red Velvet Cake

Tips for the Perfect Red Velvet

  • Room Temperature Ingredients: Ensure eggs, buttermilk, and cream cheese are at room temperature for smoother mixing.
  • Don’t Overmix: Overmixing can make the cake dense and chewy instead of light and fluffy.
  • Use Gel Food Coloring: Gel food coloring provides a more vibrant red without altering the batter’s consistency.

FAQs

Q: Can I make Red Velvet cake without food coloring? A: Yes, you can skip the food coloring. The cake will have a natural reddish-brown hue due to the cocoa powder and buttermilk reaction.

Q: Can I substitute buttermilk? A: If you don’t have buttermilk, mix 1 tablespoon of vinegar or lemon juice with 1 cup of milk. Let it sit for 5 minutes before using.

Q: How do I store Red Velvet cake? A: Store the cake in an airtight container in the refrigerator for up to 5 days. Bring it to room temperature before serving.

Q: Can I freeze Red Velvet cake? A: Yes, you can freeze the unfrosted cake layers. Wrap them tightly in plastic wrap and foil, and store in the freezer for up to 3 months. Thaw before frosting.

Q: What cake is Red Velvet made of? A: Red Velvet is a type of layer cake made with cocoa powder, buttermilk, vinegar, and a hint of food coloring to achieve its signature red hue. The combination of ingredients creates its soft, velvety texture.

Q: What is the flavor of Red Velvet cake? A: a subtle chocolate flavor with a tangy twist from the buttermilk and a creamy sweetness from the cream cheese frosting.

Q: Is Red Velvet just red chocolate cake? A: While Red Velvet contains cocoa powder, it’s not just a chocolate cake dyed red. The recipe includes buttermilk and vinegar, which add tanginess and affect the texture, making it lighter and more delicate than traditional chocolate cake.

Q: What causes Red Velvet ? A: The red color in Red Velvet is traditionally a result of the chemical reaction between cocoa powder, vinegar, and buttermilk. Today, food coloring is often added to enhance the vibrant red hue.

Chili Cheese Dip Recipe: A Crowd-Pleasing Delight

Looking for a delicious appetizer to spice up your next gathering? Chili Cheese Dip is the ultimate crowd-pleaser, combining creamy, cheesy goodness with the bold flavors of chili. Whether you’re hosting a party, watching the big game, or enjoying a cozy movie night, this dip is sure to be a hit. In this article, we’ll walk you through the recipe, step-by-step instructions, and provide tips to elevate your dip game. Let’s dive in!

Ingredients for Chili Cheese Dip

To make this flavorful dip, you’ll need the following ingredients:

  • 1 can (15 oz) of chili (with or without beans, your choice)
  • 8 oz of cream cheese, softened
  • 2 cups of shredded cheddar cheese
  • 1 cup of shredded Monterey Jack cheese
  • 1/2 cup of sour cream
  • 1 teaspoon of garlic powder
  • 1/2 teaspoon of smoked paprika (optional for added flavor)
  • 1/4 cup of diced jalapeños (optional for extra spice)
  • Tortilla chips or fresh veggies for serving

Steps to Make Chili Cheese Dip

  1. Preheat the oven: Set your oven to 375°F (190°C).
  2. Prepare the base: In a mixing bowl, combine the softened cream cheese and sour cream until smooth. Stir in the garlic powder and smoked paprika.
  3. Layer the dip: Spread the cream cheese mixture evenly at the bottom of an oven-safe dish. Pour the chili over the top, spreading it out evenly.
  4. Add the cheese: Sprinkle the shredded cheddar and Monterey Jack cheeses over the chili layer.
  5. Optional spice: If you’re using jalapeños, scatter them on top of the cheese.
  6. Bake the dip: Place the dish in the preheated oven and bake for 20-25 minutes, or until the cheese is melted and bubbly.
  7. Serve hot: Remove the dip from the oven and let it cool slightly before serving. Pair it with tortilla chips, crackers, or fresh vegetables for dipping.

Tips for the Best Chili Cheese Dip

  • Use homemade chili: If you have time, making chili from scratch can add a personal touch and deepen the flavors.
  • Experiment with cheese: Feel free to swap out the cheeses for your favorites, such as Pepper Jack or Gouda, for a unique twist.
  • Slow cooker option: To keep the dip warm for longer, you can prepare it in a slow cooker. Combine all the ingredients and cook on low for 2-3 hours.
  • Garnish with flair: Sprinkle chopped cilantro, green onions, or a dollop of sour cream on top for added freshness and visual appeal.

Nutritional Information (per serving):

  • Calories: 250
  • Protein: 10g
  • Fat: 18g
  • Carbohydrates: 8g
  • Fiber: 2g
  • Sodium: 450mg

FAQs about Chili Cheese Dip

Q: Can I make this dip ahead of time?
A: Yes! You can assemble the dip up to a day in advance. Cover and refrigerate it, then bake it just before serving.

Q: Is there a vegetarian version of this dip?
A: Absolutely! Use vegetarian chili instead of meat-based chili, and it’ll taste just as delicious.

Q: How do I store leftovers?
A: Store leftovers in an airtight container in the refrigerator for up to 3 days. Reheat in the oven or microwave before serving.

Q: Can I freeze chili cheese dip?
A: While it’s best enjoyed fresh, you can freeze the baked dip. Let it cool completely, then store it in a freezer-safe container for up to 2 months. Thaw in the refrigerator before reheating.

With this Chili Cheese Dip recipe, your next gathering is bound to be a flavorful success. Give it a try, and let us know how it turns out in the comments below. Happy dipping!